

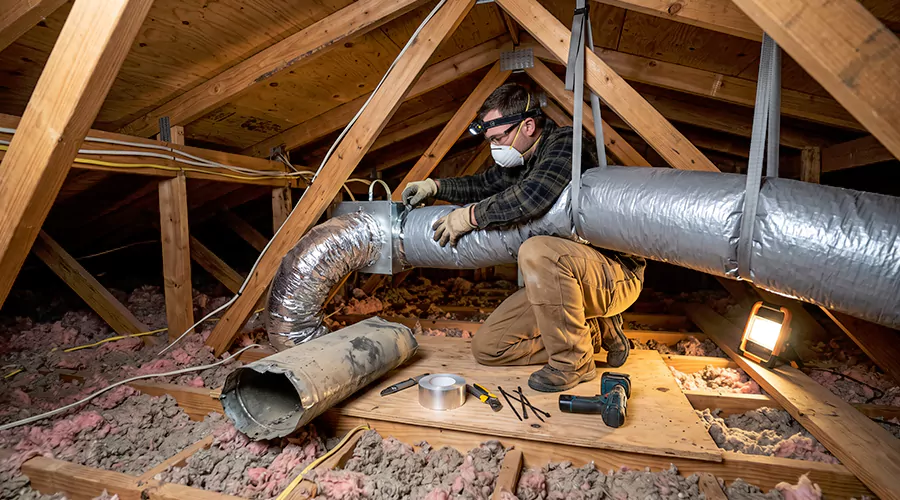
Replacing ductwork in an attic involves inspecting the existing HVAC system, designing correctly sized replacement ducts, removing damaged sections, and installing new ductwork with proper support, sealing, and insulation. The finished system should be tested for air leakage and airflow before the project is considered complete. Because attic work involves structural, electrical, and heat-related hazards, extensive duct replacement is best handled by a qualified HVAC contractor.
Many homes have heating and cooling ducts installed above the ceiling in an unconditioned attic. These passages carry air between the air handler or furnace and the rooms below. During summer, attic temperatures can rise far above the temperature inside the living space, placing additional demands on duct insulation and airtight connections.
Flexible ductwork is common in attics because it can be routed around framing and connected to ceiling registers. However, it is vulnerable to damage when installed with excessive sagging, sharp bends, or inadequate support. Metal trunk ducts can also develop leaks or insulation problems over time.
Replacing these ducts involves more than attaching new flexible tubing to existing fittings. The contractor must verify that each duct has the correct size and route, that the joints are mechanically secure, and that the insulation remains continuous. Poor installation can reproduce the same airflow problems that caused the original system to perform badly.
When Should Attic Ductwork Be Replaced?
Attic ductwork should be replaced when significant damage prevents the passage from performing properly and a durable repair is not practical. Severely crushed flexible ducts are a common example. The liner may become permanently deformed, restricting airflow even when the exterior insulation appears intact.
Other replacement reasons include extensive tearing or deterioration, severe corrosion in metal ducts, and moisture damage affecting certain insulated materials. A duct that is incorrectly sized may also need replacement as part of a system redesign. However, minor leaks and loose connections can often be addressed with air duct repair without installing new material.
Crushed or Kinked Flexible Ducts
Flexible ducts can become compressed when stored items or framing press against them. Excessive bends can also reduce the effective airflow passage. This often leads to rooms receiving less conditioned air than intended.
A slightly displaced sound duct may be repositioned and supported correctly. When the inner liner is permanently crushed or torn, replacing the affected section is more appropriate. New flexible ductwork should follow a direct route without unnecessary compression.
Torn Duct Liners and Damaged Insulation
A flexible duct normally has an inner air-carrying liner, an insulation layer, and an exterior vapor barrier. Damage to the liner creates air leakage, while damage to the outer jacket can expose insulation. In an attic, missing vapor protection can contribute to condensation when cooling ducts operate.
Limited jacket damage may sometimes be repaired with suitable materials. Extensive tearing or wet insulation can make replacement necessary. The affected material should be examined before deciding whether the entire run must be removed.
Rusted Metal Ducts
Sheet metal ductwork can corrode when water repeatedly reaches it. An attic roof leak may cause rust around seams or other exposed surfaces. Small localized damage may be repairable when the metal remains sound.
Extensive perforation or loss of structural strength is a stronger reason for replacement. Installing new metal without repairing the water source can lead to renewed corrosion. The roof or condensation problem should be corrected first.
Incorrect Duct Sizing
A duct can remain physically intact while failing to deliver enough air. The branch may be too small for the room or contain excessive length and resistance. This can cause persistent comfort problems despite a properly operating HVAC unit.
A qualified contractor can evaluate the airflow requirements and use ACCA Manual D principles to determine suitable duct sizes. Simply replacing an inadequate duct with the same dimensions can leave the original problem unresolved. The new design should address the reason airflow was insufficient.
What Materials Are Used to Replace Attic Ductwork?
Attic duct systems may contain flexible ducts, rigid sheet metal, and duct board. The material selected depends on the system design and local installation requirements. All components must provide a suitable air passage and withstand the conditions where they are installed.
| Duct Material | Typical Use | Installation Consideration |
|---|---|---|
| Insulated flexible duct | Branch runs to ceiling registers | Needs proper support and gentle bends |
| Galvanized sheet metal | Main trunks and rigid branches | Requires secure fittings, sealing, and insulation |
| Fiberglass duct board | Selected plenums and duct sections | Must be protected from damage and moisture |
| Approved mechanical clamps | Flexible duct connections | Secure inner liner to suitable collars |
| Listed HVAC sealing materials | Joints and seams | Must suit the duct material and use |
| Suitable duct insulation | Ducts outside conditioned space | Must meet applicable insulation requirements |
| Wide support straps or saddles | Suspended duct sections | Must not compress the duct |
A contractor should not choose flexible duct solely because it is easy to bend into position. Excessive length and compression increase resistance to airflow. A rigid elbow or redesigned route may be needed where flexible material would otherwise develop a sharp kink.
The replacement material should also be compatible with the connected fittings. Duct diameter and airflow capacity must match the design rather than being selected by appearance alone.
How to Prepare an Attic for Duct Replacement
Preparation begins with determining whether the attic can be accessed and worked in safely. Attics may contain exposed electrical wiring, sharp fasteners, loose insulation, and limited walking surfaces. Ceiling drywall is not designed to support people or heavy duct materials.
The HVAC contractor should inspect access routes and determine which sections require removal. Existing roof leaks and other moisture problems should be identified before new insulated ducts are installed. If water-damaged materials are present, the project may need additional coordination.
Older homes may also contain insulation or duct wrapping with asbestos. The EPA advises that suspected asbestos-containing material should not be disturbed by ordinary renovation work. Qualified assessment and appropriate procedures are necessary before removal when such material may be affected.
A contractor should plan work around attic temperatures and weather conditions. Extremely hot attics can create heat stress, and working in confined spaces may increase the risk of injury. Adequate lighting and safe access are necessary throughout the installation.
How to Replace Ductwork in an Attic Step by Step?
A proper attic duct replacement follows a planned sequence, beginning with inspection and ending with testing. The procedure below explains how qualified HVAC installers approach the work. It is not a recommendation to enter hazardous attic spaces or modify a duct system without the necessary skills.
Step 1. Inspect the Existing Duct System
The contractor first identifies the supply and return duct network and checks the physical condition of accessible sections. The inspection should document crushed branches, disconnected joints, damaged insulation, and any evidence of moisture. Airflow problems reported by occupants should also be recorded.
Photos and measurements can help establish which runs need replacement. An attic may contain several sound ducts alongside one severely damaged branch. Identifying the defects prevents unnecessary removal of material that can remain in service.
The contractor should also inspect register boots and connections to the air handler or furnace. A replacement branch cannot function properly when its supporting fittings are damaged or undersized.
Step 2. Evaluate Heating and Cooling Airflow Requirements
Before selecting new ducts, the contractor determines the airflow required by the equipment and individual rooms. ACCA Manual D provides established methods for residential duct sizing and evaluating pressure losses. Room heating and cooling load information may also be needed when the design is being changed.
Duct sizing should account for the actual length and configuration of each run. Elbows and fittings add resistance, while flexible ducts become more restrictive when compressed or excessively sagging. Proper sizing helps the system deliver the required airflow without unnecessary pressure loss.
Replacing ducts without checking the design can leave comfort problems unresolved. The correct diameter and routing should be established before materials are ordered.
Step 3. Prepare a Replacement Layout
The contractor plans the location of each new duct run and identifies where it connects to trunks, junction boxes, and ceiling boots. A good layout minimizes unnecessary bends and excessive flexible duct length. It should also maintain access to building systems requiring future maintenance.
The route must account for attic framing and other utilities. Ducts should not be installed where they will be crushed by storage or blocked by structural obstacles. If the existing path creates unavoidable restrictions, a different approved route may be necessary.
A written or diagrammed layout helps installers keep the new system consistent with the design. It also helps homeowners understand which branches will be replaced.
Step 4. Check Permits and Installation Requirements
Local building departments may require permits or inspections for substantial duct replacement. The contractor should verify the requirements before removing the existing system. Insulation ratings and duct sealing requirements may vary according to the adopted energy and mechanical codes.
A replacement project should also follow the duct manufacturer's instructions. Some products have specific support, fastening, and insulation requirements. Meeting these requirements is part of installing the materials correctly.
The homeowner should confirm that required permit costs and inspections are included in the quote. Unapproved work can create problems when the property is later inspected or sold.
Step 5. Shut Down the HVAC Equipment
The affected heating and cooling system is shut down before ducts are disconnected. Qualified personnel should follow appropriate electrical isolation procedures when working near the air handler or furnace. Removing a duct while the blower operates can spread insulation fibers and debris through the system.
The contractor should also distinguish ordinary air ducts from combustion exhaust components. Fuel-burning furnace flues carry exhaust gases and must not be disconnected or modified as if they were supply ducts. Their installation and servicing require separate safety procedures.
The equipment should remain out of normal operation while the air distribution system is open.
Step 6. Remove Damaged Duct Sections
Existing damaged ducts are disconnected from their collars or fittings and removed carefully. Installers should support the material during removal to avoid pulling against adjacent sound ducts. Loose insulation or debris should be controlled so it does not enter occupied rooms.
Flexible duct sections may contain deteriorated insulation that requires careful handling. The contractor should identify material conditions before tearing or cutting coverings. Suspected asbestos-containing insulation requires specialized assessment rather than ordinary removal.
Old ductwork should be disposed of appropriately. Sound trunks and fittings intended for reuse should be protected from damage during the process.
Step 7. Inspect Existing Connection Points
After removing the damaged runs, the installer checks the remaining collars, junction boxes, and register boots. A loose metal collar can create a leak even when the replacement duct is new. Damaged or unsuitable fittings should be repaired or replaced before reconnection.
The new duct should match the designed connection size. Reducing a branch abruptly to fit an old undersized collar can create an unwanted restriction. Where the existing fitting is inadequate, changing it may be necessary.
Connections should be clean and structurally sound enough to accept the approved attachment and sealing methods.
Step 8. Install New Main Ducts Where Required
When the project includes main trunk replacement, the contractor installs the rigid or otherwise approved main passages according to the design. Main ducts must be adequately supported and properly connected to the equipment and branch takeoffs. Their alignment affects how easily branches can be routed.
The installer should avoid sharp transitions that add unnecessary resistance. The ductwork must also be kept separate from electrical wiring and other building systems according to applicable requirements. Structural framing should not be cut or altered without proper approval.
New trunk sections should be inspected before branch installation continues. Correcting a fitting while it remains accessible is easier than reopening a completed system.
Step 9. Install Flexible Branch Ducts
Flexible ducts should be extended to an appropriate length and routed with gentle bends. The inner liner should not remain compressed or twisted. Excess material should be cut to the correct length according to the manufacturer rather than coiled in the attic.
The U.S. Department of Energy recommends that flexible ductwork be installed as directly as practical to limit sagging and pressure loss. Sharp bends near fittings can restrict airflow, particularly when the liner is forced against a collar. A suitable rigid elbow may help where the geometry makes a gentle flexible bend impractical.
Each branch should reach its intended register boot without being stretched excessively or allowed to sag. The installer should confirm that the route follows the design before securing the connections.
Step 10. Secure the Inner Duct Liner
A flexible duct connection requires the inner air-carrying liner to be attached securely to the appropriate collar. Approved mechanical clamps or drawbands are commonly used according to the product instructions. The connection should not rely only on ordinary tape.
The joint must then be sealed using material approved for the duct system. Appropriate HVAC mastic and listed duct closure products may be used as specified. Ordinary cloth-backed duct tape should not be treated as a durable permanent seal.
The outer insulation and jacket are restored after the air connection is secured and sealed. All layers must be addressed because the inner liner and outer vapor barrier perform different functions.
Step 11. Support the New Ductwork
Flexible ducts need adequate support to prevent sagging and crushing. The Department of Energy's Building America guidance recommends support straps or saddles at intervals no greater than four feet, with supports at least 1.5 inches wide. Maximum sag should be limited to approximately half an inch per foot between supports, subject to the manufacturer's instructions.
Additional supports are appropriate around bends and connections. Narrow straps should not be tightened so much that they compress the duct liner or insulation. Excessive compression can reduce airflow and create cold spots where condensation may develop.
Supports should attach to suitable framing rather than unsupported ceiling drywall. The completed duct should retain its intended shape throughout the run.
Step 12. Seal All Duct Connections
Duct joints must be sealed to reduce conditioned air leakage. The installer should inspect connections at the air handler, trunks, junction boxes, and ceiling register boots. All appropriate seams should receive a compatible sealing method.
Mechanical fastening comes before sealing. Mastic or approved closure tape should not be expected to hold together a poorly attached duct. A well-secured fitting provides the stable base needed for durable sealing.
Return connections deserve the same attention as supply joints. Leaks in return ducts can draw hot, dusty attic air into the system. Sealing both sides of the network helps maintain the intended airflow path.
Step 13. Install and Restore Insulation
Ducts in unconditioned attics require insulation appropriate for the adopted local code and climate. Many residential energy-efficiency programs specify R-8 insulation for supply ducts outside conditioned space, with different requirements for certain return ducts. The installer should verify the actual local standard.
Insulation must cover the full duct length and connections without large gaps. A compressed insulation layer does not provide its intended thermal protection. The exterior vapor barrier also needs suitable continuity to help limit condensation during cooling operation.
A duct that is well sealed but poorly insulated can still gain substantial heat from a hot attic. Both air leakage and heat transfer need attention.
Step 14. Inspect Register Boots and Ceiling Penetrations
Each duct should connect properly to its intended ceiling register boot. The boot should remain secure and properly supported so movement does not pull against the flexible branch. Gaps where the boot meets the ceiling can also allow unwanted air movement.
Appropriate sealing around the boot and ceiling penetration helps limit leakage between the attic and living space. The method should be compatible with the surrounding materials. Required fire-rated assemblies must be restored using approved details.
Registers should remain accessible and correctly installed after the work. Adjustable dampers should be placed according to the system's intended airflow settings.
Step 15. Test the Ducts for Leakage
After installation, the contractor should check the duct network for leakage. A duct pressurization test using appropriate equipment can measure air escaping through joints or defects. The acceptable result depends on the applicable code or program requirements.
A leakage test is particularly useful in attic installations because escaping conditioned air is lost into a space outside the home's normal conditioned envelope. If substantial leakage is detected, connections should be inspected and corrected before the project is considered complete.
The contractor should provide the test results when testing is part of the agreement. Visual inspection alone may not identify every small opening.
Step 16. Check Room Airflow and System Operation
The HVAC system is returned to normal operation after the ducts have been secured and tested. The contractor should evaluate whether appropriate airflow reaches the intended rooms. Static pressure and register airflow measurements can help identify restrictions or balancing problems.
A newly installed duct network may require adjustment of approved balancing dampers. The goal is to distribute air according to the design rather than create equal airflow at every outlet. Rooms have different heating and cooling requirements.
If airflow remains weak, the contractor should investigate the duct route and equipment conditions. A newly installed duct can still be restrictive when it contains an undersized fitting or sharp bend.
Step 17. Complete Final Cleanup and Documentation
Old duct materials and installation debris should be removed from the work area according to the agreed scope. The contractor should check that attic insulation disturbed during installation has been restored appropriately. Access panels and register covers must remain secured.
The homeowner should receive an explanation of the work completed, including any design changes and testing results. Photographs can be useful because much of the finished ductwork will remain out of sight. A record of material specifications and warranties can also help with future maintenance.
How Should Flexible Ductwork Be Installed in an Attic?
Flexible duct performance depends heavily on installation quality. The inner liner should be pulled to its intended length so it does not form unnecessary folds. Long loops and repeated sharp bends can increase pressure loss even when the duct diameter appears adequate.
Proper support is equally important. Straps or saddles should be wide enough to hold the duct without compressing its insulation. Narrow hanging wire can damage the jacket and distort the passage.
The duct should also connect correctly to its collars. Its inner liner must be mechanically secured and sealed, while the insulation and exterior jacket must be restored around the connection. A loose exterior jacket does not substitute for a properly attached air-carrying liner.
An installer should inspect the entire run after installation. Flexible ducts can become kinked while other branches are being positioned. Final visual checks help identify problems before the work area is closed.
Should Attic Ductwork Be Suspended or Laid on the Attic Floor?
Both approaches can be appropriate in certain installations, but the correct choice depends on the attic assembly and local requirements. Flexible ducts placed on an attic floor still need protection from crushing and must maintain their intended routing. Suspension can be useful when the duct needs to cross framing or avoid obstacles.
Suspended ducts should be supported according to the manufacturer's instructions and recognized installation guidance. The support should not squeeze the insulation or create deep sagging between hangers. Additional support is needed near bends and connections.
Attic-floor installations require attention to insulation and moisture conditions. Some high-performance attic strategies place ducts within or beneath attic insulation under carefully designed conditions. Such approaches should not be improvised because moisture behavior varies by climate and attic construction.
The contractor should explain how the selected route meets the design and installation requirements. The objective is a short, well-supported, protected duct system.
How Much Does It Cost to Replace Ductwork in an Attic?
Replacing attic ductwork commonly costs $2,200 to $5,600 for many residential projects in published U.S. estimates. A smaller replacement involving one or two accessible runs may cost less. Large systems or difficult attic conditions can push the price higher.
The cost depends on material quantity, attic accessibility, insulation, and whether the system requires redesign. Replacing main trunks and return ducts involves more work than replacing several flexible supply branches. Additional building repairs or specialized material handling can also affect the estimate.
Homeowners should request a quote that identifies the exact duct sections involved. The price should state whether old material removal, insulation, sealing, and final testing are included. A cheaper installation that omits those tasks may not provide the intended performance.
How Long Does Attic Duct Replacement Take?
Many straightforward residential attic duct replacement projects can be completed in one to two working days. Replacing only a few branches may take less time, while extensive redesign or difficult access can require several days. The schedule should account for safety conditions inside the attic.
High temperatures can limit the amount of time crews can work safely during certain seasons. Access restrictions and unexpected damage may also affect the schedule. The contractor should plan equipment downtime and material delivery before installation begins.
Final sealing and testing should not be skipped to shorten the appointment. A duct system may look complete while still containing leakage or airflow restrictions. Verification is part of the installation rather than an optional cosmetic step.
Can You Replace Attic Ductwork Yourself?
Limited repairs to safely accessible ducts may be possible for experienced homeowners who understand the materials and equipment. However, extensive attic replacement involves several concerns beyond attaching new ducts. Safe movement across framing, electrical hazards, duct sizing, and compliance with local building requirements all need attention.
Attic environments can also present heat exposure and insulation hazards. Older materials may require assessment for asbestos before disturbance. A homeowner should not begin removing duct wrapping without understanding what it contains.
Incorrect duct sizing or support can reduce airflow and increase operating costs. For substantial replacement, a qualified HVAC contractor is the better option. This also allows the completed system to be tested using suitable equipment.
What Mistakes Should You Avoid During Attic Duct Replacement?
Poor installation can recreate the same problems that existed before replacement. A new duct can perform badly when it is crushed, left unsealed, or installed with excessive length. The most common errors involve sizing, fastening, insulation, and support.
Avoid these mistakes:
- Replacing ducts without checking the required airflow.
- Reusing fittings that are severely damaged or undersized.
- Leaving excessive flexible duct coiled in the attic.
- Installing sharp bends near connections.
- Supporting ducts with narrow straps that compress insulation.
- Allowing long unsupported sections to sag.
- Connecting only the exterior jacket instead of the inner liner.
- Relying on ordinary cloth-backed duct tape.
- Leaving return duct joints unsealed.
- Installing ducts with incomplete insulation or vapor-barrier coverage.
- Blocking attic ventilation or other building equipment.
- Disturbing suspected asbestos-containing insulation.
- Walking on unsupported ceiling drywall.
- Skipping leakage and airflow verification.
The project should also protect the attic's existing electrical and structural systems. Ductwork must not be installed by cutting or weakening structural members without an approved design. Good installation involves coordination with the building as well as the HVAC equipment.
How Can You Keep New Attic Ductwork in Good Condition?
New ducts should be protected from physical damage and moisture. Avoid placing stored items on top of flexible runs. Even moderate weight can compress the liner and reduce airflow.
Roof leaks and condensation problems should be repaired promptly. Wet insulation can lose its intended performance and may require replacement when significant damage occurs. Periodic visual inspection can help identify torn outer jackets or separated connections.
Include accessible duct connections in future HVAC maintenance inspections. A branch that has shifted or become loose should be corrected before it causes substantial energy loss. Keeping the surrounding attic free from unnecessary traffic also helps protect the installation.
Conclusion
Replacing ductwork in an attic requires correct sizing, careful removal of damaged materials, and proper installation of the new air passages. Flexible ducts must be supported without excessive sagging or compression, while all connections need suitable fastening and sealing. Insulation and vapor barriers are particularly important in unconditioned attics. The finished system should be tested for leakage and appropriate airflow. Before beginning replacement, have the existing ductwork inspected and request a design-based installation plan.